Creation of Galloper Environment Concept
Tuesday 4th October 2011
I decided to create a piece of concept art to visualize what exactly i wanted to create.
I started off with some rough sketches of how Gallopers looked:

I then worked on a composition for the concept. I knew that my vision was of the Gallopers in a warehouse with one single light source.

Once i was confident with the layout of the image i created the concept in Photoshop using a Wacom Tablet. I worked first with Grey Scale:

When i was happy with the tonal value and the overall layout of the image, I created an overlay layer. This layer is used to add colour. I often use this technique as it is a quick and easy way to get different shades of colour, this is because it uses the tonal information from the grey-scale layer.

The finished Concept:

Creation of Environment Concept, Entrance
Tuesday 11th October 2011
As described in my reflective diary I visited Manchester Town Hall, here i found a courtyard that would work perfectly as the entrance to the warehouse where the Galloper is in storage. Bellow are a few pictures taken of the environment:

Image 1: Roof of Courtyard.
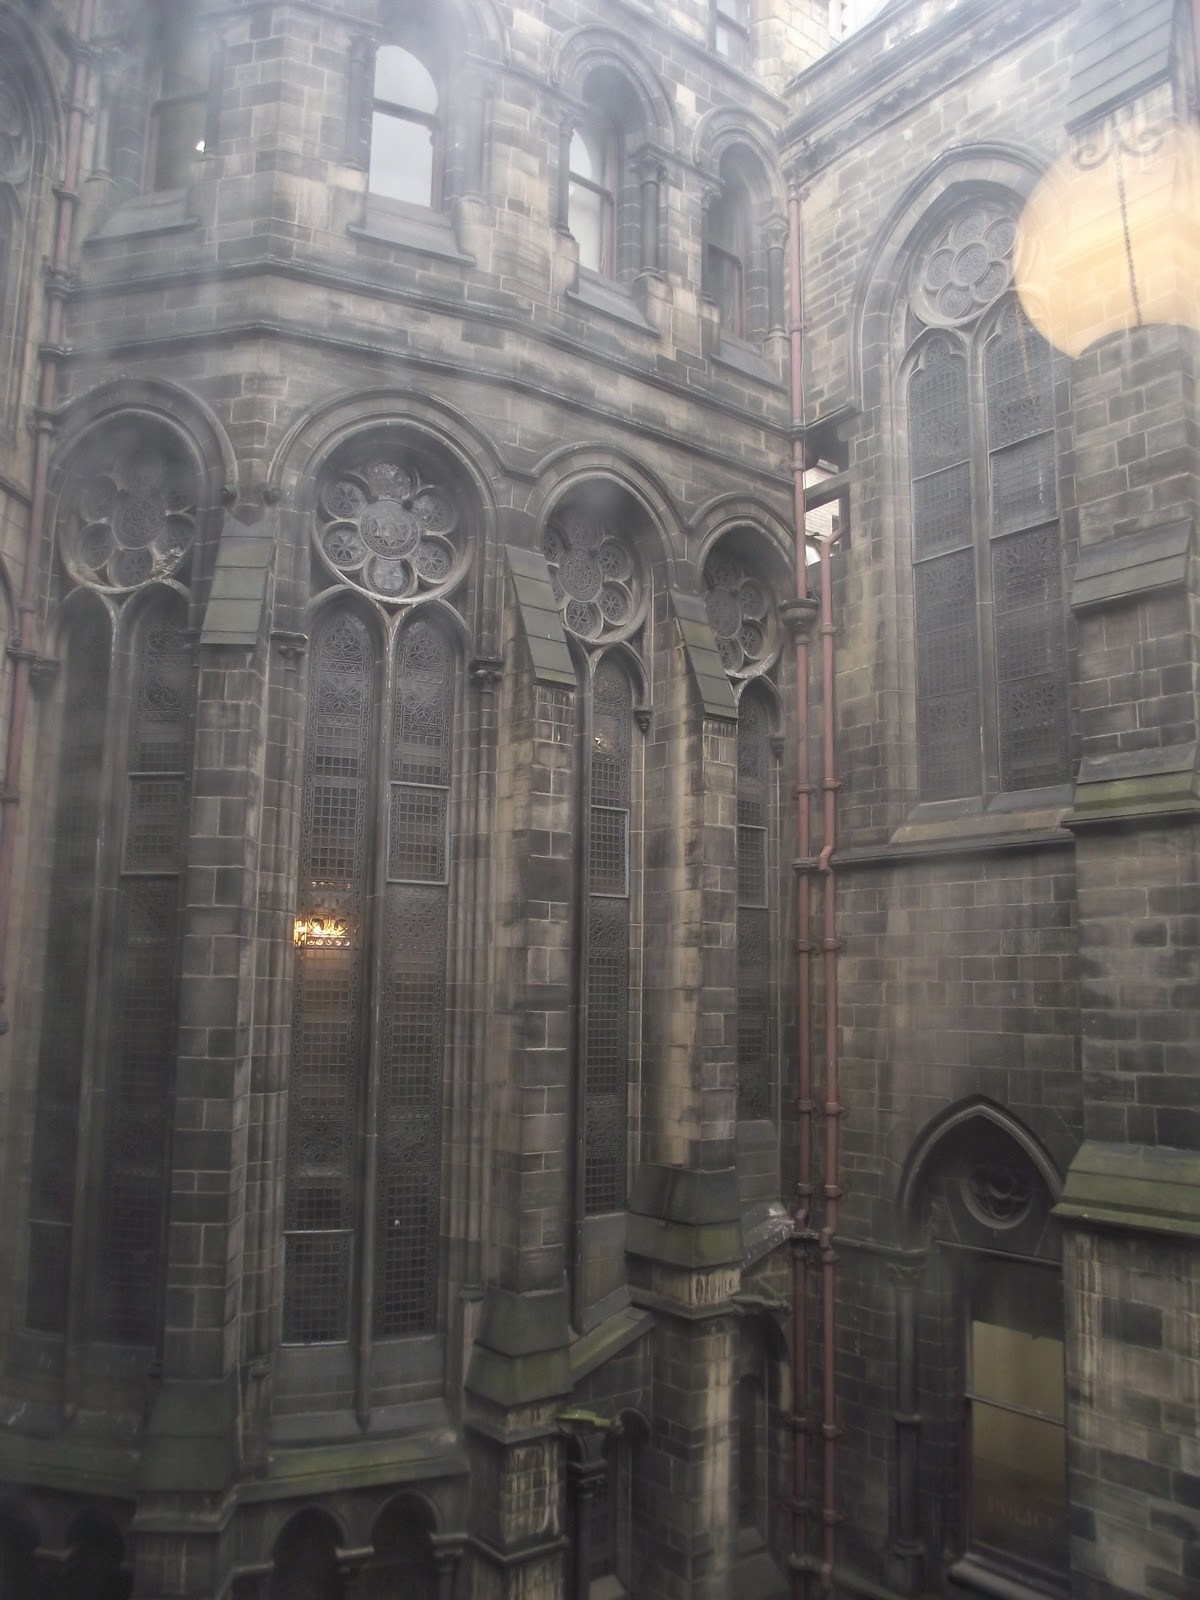
Image 2: Windows in Courtyard.

Image 3: Passage way through Courtyard.

Image 4: Courtyard.
As you can see from these images the courtyard has a lot of character. I found the amount of detail in the brick work and windows to be amazing, considering it was an internal structure not viable from the outside of the building. I knew that i wanted to work in the brick and window designs into my 3D environment in some way, also the cobbled surface of the floor.
I found Image 3 to be the most interesting of the 4 above. I imagined this to be the entrance too the storage area. I loved the claustrophobic overpowering wall structures towering above the passage way. The dark Tunnel looks uninviting and dangerous. This is the image from which i based my concept.
Firstly i roughly laid out the shapes and structures in a rough sketch, once again using Photoshop and a wacom tablet as my tools. Bellow I will show each layer of the Concept and describe why it has been used:

Layer 1 rough sketch, used to arrange the view and positioning of the concept.

Layer 2 Once i was happy with the rough sketch i created a detailed version, revealing all of the brick work and structural information.

Layer 3 I then worked in black tone to bring out the dark areas of the image.

Layer 4 After the black tone was added I applied White to areas to bring out the lighter detail.

Layer 5 I then worked in fine black detail to bring out the shape of the brick work and structure.

Layer 6 Once i was happy with the fine detail created using dark tone i added light fine detail.

Layer 7 When i was happy with the tonal information i worked on an overlay layer to which i applied colour. The colours where taken from Image 3 as they where perfect for my scene.

These are the colours used in the overlay layer.

Layer 8 I then added shading around the outside of the image so the central point was the main focus.

Layer 9 I then created a focus point of the image, by making the center clear and the outer left and right blurry it makes the viewer focus on the intended area. This is a great effect to use for depth of feel.
This Concept took around 4 hours to create.
Maya Test Creation
Thursday 20th October 2011

As explained in my reflective diary I created this basic Galloper model to use as a template from which i can create my final model.

For this Test i decided to made a three-abreast Galloper ride. The scale and shapes for the model where taken from an image found in 'Fairground Architecture' by David Braithwaite. The image depicted Mr Billy Ashley's Three-abreast `Galloping Horses.' An image of this can be found on the Inspiration page of my blog.

One of the most important features of this model are the horses themselves. I realized it would be foolish to create many different models so I made one model and then created three more variations. This was done by altering the position of the head and feet for each one. With this in mind when i come to model the final horse design i can create one model and UV map it. from there i can just tweak the positioning of its legs and head to vary the shapes of the other horses.
Top Section Decoration concept creation
Tuesday 15th November 2011

Figure 12: Old Carousel Top decoration.
I took inspiration for my concept from this image of a old Carousel. I was attracted to the shapes and forms with the use of Gold, Cream and red. This colour palette will be tested.

I created a rough sketch in my sketchbook. When i was happy with it i scanned the image into Photoshop and worked on the quick concept.

At this point i had made sure the structure was tiled and ready to paint. As you can see it is clear what the shapes in the structure are and the relationship with the decoration is straightforward.

This finished concept will be used as a template in Maya to create the top section of my Galloper ride.
Galloper work flow
Monday 28th November 2011
I will now show the stages in making the Galloper.

For the top of my Galloper I thought it would be easier to create it from one section, like a piece of cake. Once I was happy with the shape I UV mapped the section and created the circular structure.
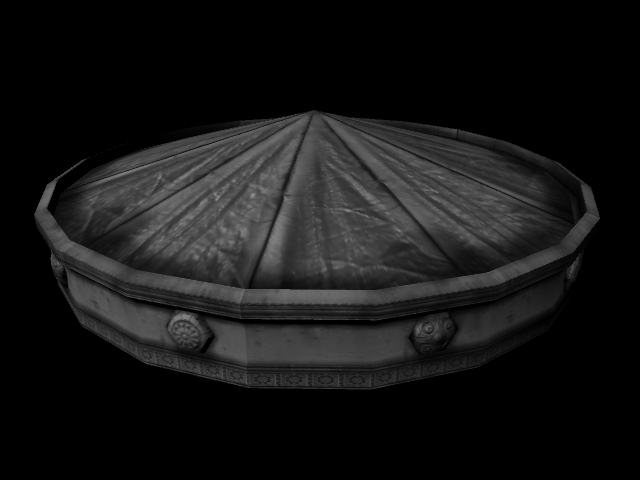
The image above shows the sections connected and textured in grey scale.

Once happy with the textures I applied colour to them. I selected my colour palette based around images I had found of Gallopers on the Internet.

Then text was applied too the top piece. Through research I found that Gallopers used expressive words like exiting and enjoyment in there decoration. I took inspiration from this and went with Galloer, Exciting. Also at this stage i removed the seam created by the texture. In the image above the base of the ride has also been modeled with a basic grey-scale texture applied.

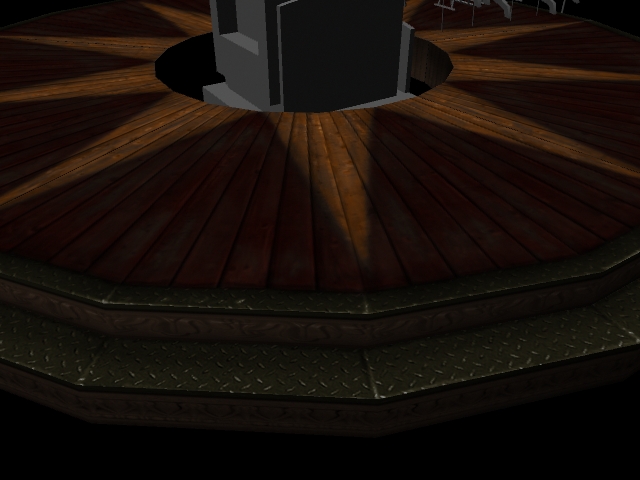
I used the same colour palette for the base as i did with the top. I found this would help the model work better aesthetically.

I created these poles to keep the model structurally correct. I had to manipulate the base texture to add shaded areas where the poles enter the base.

Up to this point I have created the top and base of the Galloper, also the poles have been added. They have all been textured and work well up to this point. Now I am going to create the central structure of the ride.

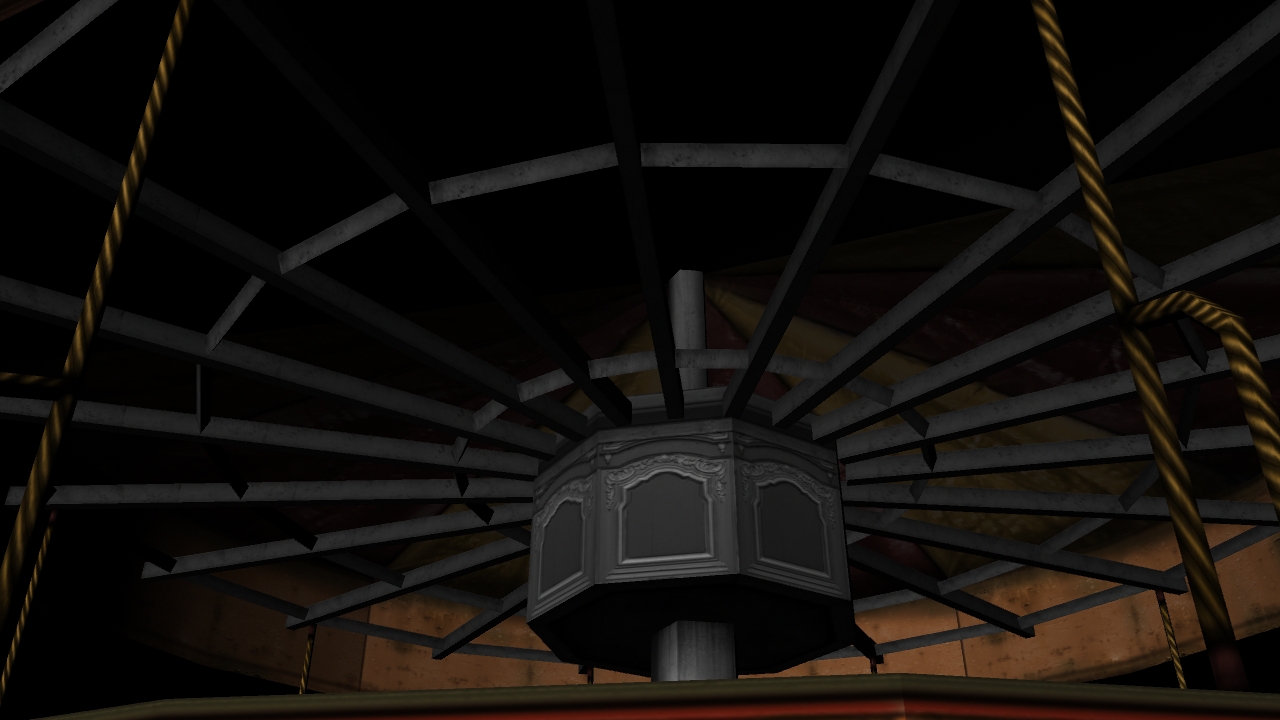
The whole central section is on its own Uvmap . I kept with a traditional structure that I found in my research.


Keeping with the same colour scheme I used images found on CGTextures.com and manipulated them to create the texture for this central section.

At this point the central section is complete. So far I am pleased with the overall structure of the model. The textures are working well and I am ready to model the Horses and the Central components. These consist of: the pay booth, organ, boarders and the steam engine.
Modelling the Horse for the Galloper


For the modelling of the horse i knew it was important to keep it as low poly as possible, but enough that i could show the natural anatomical structure. I knew from the start that it was important that the horses mouth and eyes where modelled and not just a texture.


The textures I used on the horse model were quite traditional with Galloper horses. The decoration is a big part of the overall look of a Galloper and this is especially relevant with the horse. I wanted the horses face to be menacing and quite scary. I chose to emphasis the horses mouth and eyes to really draw the payers attention to their face.


Once again I thought it would be important to keep with the same colour palette. at this point when the initial horse was UVmapped I then duplicated it and changed the position of the legs and head. This will help remove repetition in the model as the horse will be duplicated 18 times.

As you can see in this image I have modelled the central components of the Galloper. I have also created 3 different horse textures and 3 silhouettes to remove repetition.


In a Galloper ride the Central components are highly detailed with decoration, the organ and steam engine being structurally complex. As the player will not be able to get rely close too these models I knew I could keep them quite low poly and rely on the texture work to provide structural information.
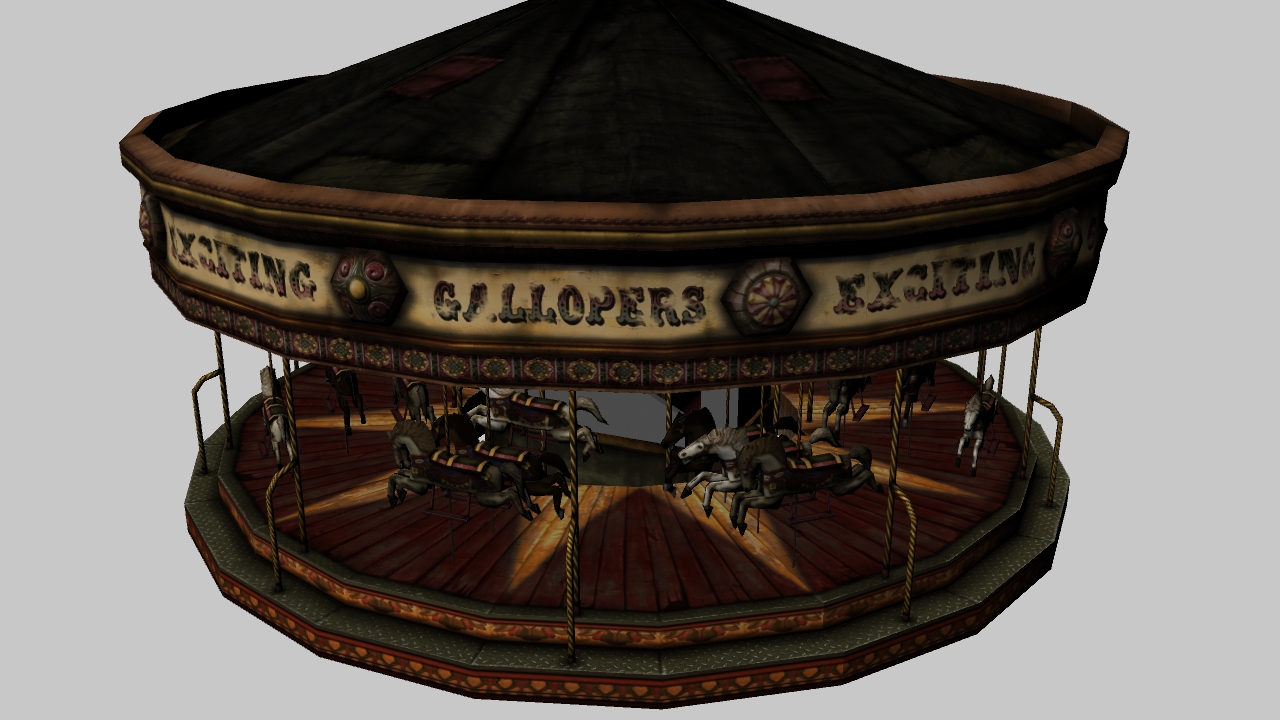
I acquired some feedback for the look of my Galloper. The top of the roof was originally red and yellow and looked to shiny in comparison to the rest of the model. Josh told me that most of these roofs are green, so with this in mind I re-painted it a dark green and added stitch work with patches of fabric to give the illusion it has been damaged at some point.


At this point the model is finished. Now it is saved as an FBX file ready to be imported into UDK. In all the model is made up of 7 texture files, the base, main central structure, top section, central components and 3 horse textures.
Textures for Galloper

Texture for base and poles.

Texture for central structure.

Texture for top section.

Texture for central components.


The 3 different horse textures.
These textures were created in Photoshop and then using CrazyBump I created Specular and Normal maps for reach one. Now the model is complete and the textures are finished I imported all into UDK.
Model in UDK


you have put a lot of effort in to this. cant wait to see a walk through with sound
ReplyDelete